Wednesday, November 28, 2012

The Bike Rack

Last year, for Christmas...
my daughter and I were perusing BLOGS
and came across an entry from Heidi Swapp's 
where her hubs was making them a cool bike rack.
(for the life of me, I cannot find that entry)
BUT
We decided that we'd have Terry make one for them for their Christmas gift.
So, with using wood we already had 
(we very seldom go BUY something)
Terry made this:


 It's 2-sided.
When I came home from work one day... 
I couldn't believe it!
I dunno, I just didn't think it would be so...
beautiful?
Cool looking?


I thought the top was gonna simply be a 2x4,
but he made a 'table top' so they could put their helmets up there.

Here it is with [our] bikes in it.

 
Pretty darn nice, huh?


 Soon after, he made one for one of my daughter's friends.
She wanted hers ONE-SIDED and LONG.


This one he kept a lot simpler, to keep the cost down.
...And spaced the slots so the bikes fit in comfortably. 


Then, last, he decided to make one to fit in the back of our pickup.
Ya know how bikes flop around when you are driving along?
This keeps 'em solid!


Now, we just need to GO somewhere,
instead of constantly working. 


...and I gotta get new tires for my bike 
(the gold/tan one) 


I'm gonna be sharing some 'old' projects for a bit,
while we are working [like crazy]
on some new projects for Christmas.

thanks for visiting!

danella

Sunday, November 25, 2012

The Beginning of Christmas

This is something we've always wanted to do for Christmas.
And now, due to being asked to decorate for a Christmas Party at our Church,
we are finally doing it!


These pictures are outside on a bright sunny day.
Inside, they will look a lot different, and I will share it with you.


Yes, a Stable and Manger.
Perfect for Christmas. 

Details of the front, top.
We used OLD wood that Terry has collected since we've been here in Arizona. 
The Arizona sun works as art on wood, making it look very old.


The back.  Originally, it was just going to be an 'X' brace,
but Terry decided to this instead!
And I'm so glad he did.  It looks so much better, and provides a beautiful backdrop.


The roof.
I LOVE old wood. It is so beautiful to me. 


The side of the stable.
These were made from actual old fence panels that we picked up at 
ReStore for a dollar each! (a while back, not knowing what we were gonna do with 'em)


 ...and the Manger.
Sweet and simple.
This wood came out of a 'throw-a-way' pile.


For the party, we will add straw, lights, and a baby [doll] (maybe).

I gotta show you the befores,
and some 'bloopers'!

My drawing to begin...


My way of sizing things up, on the ground, to figure out the dimensions.
We didn't want it true to life size, as it would be un-manageable to move it! 


Laying out the sides, to get a start.
And yes!  We used old rusty nails!!!


Terry working on the framing.
 

Then, of course when we were taking the photos:
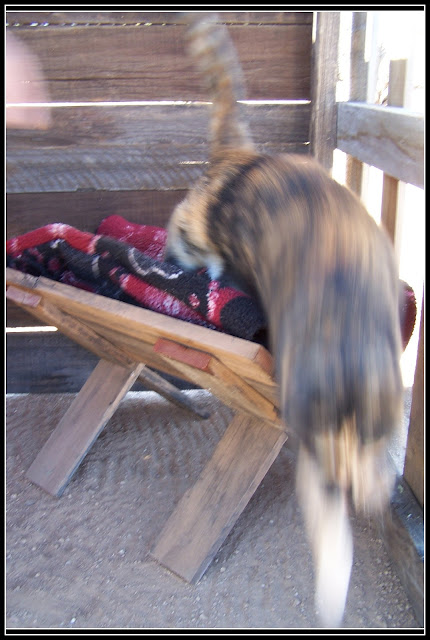
 Our kitty, Ariel, was hanging around checking things out.
We had to 'scoot' her out of some of the pictures.
THEN, we decided, she must want to surely try out the manger?
Terry added her blanket...
But NOPE...off she ran helter skelter!!!
 

Here is the ONE photo we got of her,
lying there peacefully, for but a moment of time. 
This was after several attempts, we got her to stay still for a split second. 
See how blurry her tail is?  That's 'cause her tail is twitching because she is ready... to RUN! 
...and sure enough, a moment later she was gone.


 thank you my friends, for visiting.

danella

Saturday, November 24, 2012

Scrapbooking?

Did you think I was NEVER gonna show you any scrapbooking projects?
Think again!
I DO still do it.
In fact, recently I completely cleaned and PURGED big time, my craft room.
Took me... ohhh over a WEEK!
My goal was to get rid of one complete bookshelf worth of STUFF.
...and the bookshelf too!
 And I did it.

I'll show you some photos in a later post of the bit more 'airy' room! (ha)

In doing the CLEAN-UP, I came across a LOT of un-finished projects. 
I made a GOAL of getting those finished up.
And this is the beginning of that GOAL.
So, some of the papers and products you will see are older, 
but still much LOVED.

I have had the photo on this layout for YEARS.
It's been hanging around in the open for me to admire!
I finally decided it's TIME to do something with this photo.
I searched on Pinterest for the 'perfect' layout to scraplift from.
And found it!  (It's a layout from the Basic Grey Blog
Look on my Pinterest Board "Scrap - gonna DO NOW" , and you will easily see my inspiration.
 (you can click on the 'Basic Grey Blog' and it will take you to the BG blog to the part where the inspiration is! OR, click on 'Pinterest Board' above, and it will take you to my Pinterest, OR
click on 'inspiration' and it will take you to the picture itself on my board!


I lOvE this layout so much, it's been on my board for months.
I just can't bear to part with it! (I give most layouts to my daughter!)
I used my much loved [old] Basic Grey papers that happened to be perfect for it.
The photo is of my first grandson... SO CUTE!

The next layout is another picture I've had for about three years.
It was one of those 'lucky shots' that just turned out SO CUTE!
(yeah, I repeat myself when it comes to my grandkids!  Don't we all???)

It too, uses older products.  I'm also trying to use up this STUFF I have...
which seems endless, but I love it no less. :)

I did use Heidi Swapp's [newer] banners and sequin heart  though!  
Of course, I still love and follow her adventures.
For those of you that don't know... I have ALWAYS been a huge fan of Heidi Swapp.
She is one of my biggest inspirations.
Right now, if you don't know, she has a little 'show' on MY CRAFT CHANNEL.
Check it out... you can click on 'SHOWS', select Heidi Swapp, and ENJOY.

Without further ado, here is the layout...
(I just used the 'inspiration' in my head for this one)


(the big black 'dots' in the upper corners are the magnets holding it on my board...oops)

I'm just finishing up a REALLY COOL project that I think you will LOVE!
It's coming here soon.

thanks you all, for visiting me!

danella

Thursday, November 22, 2012

A Thanksgiving Day

I hope you all have a great Thanksgiving Day.
I'm off work today!  I can hardly believe it.
I'm really grateful for that.

Today, Terry and I are going to make a [simple] life-sized stable.
First we will use it for a Church Christmas dinner, 
then it will probably go to my daughters for her HUGE front yard for a holiday outside display.
(I will share it with you later)
We are also making a cute little manger...
all to remind us what Christmas is all about.
The BIRTH of our Savior Jesus Christ.

We will go and eat and celebrate later today with my daughter and friends.
YAY

I wanted to share with you a cute project that I made last year.
Remember I said that I LOVE colors and themes.
NO...same color/style throughout my house?
I meant it.  There are just too many things I LOVE.
Our bedroom is all about the BEACH.
Terry and I both lived on the coasts when we were growing up.
He, on the Oregon Coast, me on the California Coast!
So we just have it in our blood.

My daughter, Kari, and I actually made this last year for HER room.
Alas she never used it, as her room was too 'pretty and clean' for something this rustic.
So it eventually went back to me, for our room!
We had SO MUCH FUN making this TOGETHER.

First, again, this project was FREE.  All it takes is a little creativity!
Terry does alot of 'clean-up' type jobs, and he often ends up with odds & ends of WOOD.
This  is his PILE out back!
Kari and I went through it to find our 'perfectly aged pieces'.


After finding our boards, and cutting them to the right size,
we placed them in 'order' and put cross boards on the back to hold them in place.
(Sorry, I don't know very many 'technical' words, I'm just trying to describe it the best I can!)


HA... you can see how 'technical' we are!  
We don't neccessarily have the correct tools to do everything, so we compromise.

Next, we enlisted Terry's help to put it together.
I'm a 'lazy wimp' when it comes to doing THIS PART, 
as I have a hubs that LOVES to do it for me!


Then we gotta look through Terry's RUSTY NAIL collection
to find the 'perfect' rusty nails to add to the front!


After we found our 'perfect' rusty nails...
we nailed the boards on the front to make it LOOK like they were nailed on.
(But, in fact, we screwed 'em on with [new] screws on the back)


Then came a really fun part.
The beachy 'sayings'.
Kari and I came up with them ourselves... just thinking together.
I have a bunch of [old] scrapbooking foam letters that I love, and hang onto.
We used those and some acrylic paint,
and began 'stamping' our words.


I have such fond memories of doing this project.
It was such a great and fun collaboration between my daughter and I!

Here it is, finished... to go to Kari's.
(Except, it never went up in her room ... so it eventually came back to my house)


Here it is in my house in our BEACH bedroom!


The wall above the bedl...
That's Billy Bob on the bed, in his SPOT!
I think kitties make such CUTE personalities in pictures!


... and the whole wall!
Terry built the shelf above the bed soon after we moved into this house,
'cause I needed it for all the beach JUNK we have!
He surfed when he was young, thus the beloved surfboard that we can't part with.
(The surfboard isn't really HIS from then. His 'real' one got blown off his car when he was moving years ago.  SO SAD  But this one was given to him by a friend, so it is his substitute)
The hanging lamps are from IKEA.
I've seen lamps hung so many times on pictures from PINTEREST,
and hunted around my house 'til I found MY perfect solution!
The long white pillow I found at Salvation Army for a mere $4!
I walked by it, it caught my eye, I looked and snatched it.
What a steal.


thank you, my friends,
for visiting me today.
I hope and pray you all have a wonderful 
Thanksgiving Day!

danella

Tuesday, November 20, 2012

Part 2 - The OREGON Room

Today, you'll see the finished room.
We decided to do a room featuring our beloved state of Oregon.
We are living in Arizona now... but missing it terribly.
So in making our plans about how to 'do the room', we decided, since we have STUFF already for it, and we miss Oregon so much, why not have a little bit of it here?
So, here it is.
The Oregon Room!


The above picture is what you see when you walk into the [very tiny] room.

The bed is built ON a dresser, with framework on the walls, to hold the mattress.
It works great.  Saves a ton of room, [in the tiny room] and gives a lot of storage!
 

Here is to the side a bit, showing details.


A close-up of the wonderful wood and a cool stick 
Terry found outside, that we added a few elements to.


A close-up of the little bird that Terry carved a while back.
It worked perfect in this room!


Next, I HAD to have 'my' owl post.  I have such fond memories associated with it.
It sat outside here for nearly three years here in Arizona
Not to mention the five years it was outside on our deck in Oregon!
I brought it in, and LOVED the grayed wood with the greenish boards behind it.
You can see on the left side bottom, where we ran out of the wall boards.
Terry came up with the idea to make a little 'fence' with some old fence boards we had.
And notice too the closet doors. I HATED the closet (to the left) being too bright WHITE.  
So I painted them!


This is the pillow up close.  I had the fabric squares for years.
They were in the little collection packet.  They just happened to MATCH!
I couldn't believe it!
I needed pillows, and I had just enough squares... like EXACTLY... to make two pillow shams!


They were easy... after piecing them together, and placing them on some thin batting,
with a backing... I simply stitched diagonally across the squares.
Then assembled it into the sham.

Remember the plain stained cabinet???
I told you watch for huge changes?
I painted it Hunter Green (same as the wall behind the wood boards)
and...
painted CHALKBOARD PAINT on the doors!


So, do ya think my grandkids love it???
Can you tell???
The top left door has:
To: Mae (that's what they call me... it's Ma [long] e)
From: Becub (I call him that, from when one of his little friends called him that years ago.  So he, bless him, calls himself that for ME... talk about touching my heart.  So sweet and cute!)

Here you can see it, with all the cool STUFF above it!
All the baskets STORE STUFF!
Each and every one.  You all know how much stuff we all have!
You can see my 'old' paperbacks behind the baskets, under the birdhouse...
I don't have enough room in my house to hold all the stuff!
Alot of the 'stuff' is seasonal decor.


The cabinet is on the opposite wall from the bed.
Here is the rest of that wall.
As I mentioned before, we had alot of open seams in the walls where the strips were.
All of those we covered with OLD USED wood, used as battens.


Notice above... the shelving.
We were really trying to be creative in creating storage space.
Thus the beautiful shelving up high.
The ceilings are all sloped, so there are high spaces, with plenty of room to put stuff.
I couldn't just 'junk' it up, you know.  It has to look 'pretty'!


...and a few details...


Just to the left, you can see a carved tree.  I did it... or most of it!
Really!  Terry is a chainsaw carver, and I wanted to TRY.
I actually did not finish it, I made HIM do it!
But it will be mine forever (I think!)

Then, on the door side of the room;
My favorite little wall cupboard I got from Craft Warehouse years ago.
I LOVE LOVE LOVE that cupboard!
... and, a cedar chest that my mother's twin brother made before I was born.
I don't have much from my family, so I treasure the chest.
BUT.  It was SO ... oh my... 'messy' looking.
I finally decided to sand it, and paint the bottom part.
The top I worked on for awhile, and got all the old stain and varnish off!
It's SO much more beautiful without that junk on it.
I plan on waxing it. (It's not done yet.)


Here's a close-up of the cupboard on the wall.


 Yes, I made the little quilt, years ago. 
All the cute little accents and lamp are from our home in Oregon.


 The cedar chest with a 'gnome home' that Terry made for me for my birthday.
I love it... and finally found a good 'home' for it on this table...
but as a 'bear home'!


Then, the window wall.
Terry completely tore out the old white trim,
and replaced it with re-claimed wood!
SO much better!
(He has done this with other windows in our house, only using his beloved cedar!)


Terry made the little table set for the grandkids when they came to visit us in Oregon.
They were thrilled (and remembered it!) when they saw we had it here in Arizona!
...and they use it all the time. 
 

...and last but not least.
Our ceiling light.
We don't have a 'hook-up' for a ceiling light in this house.
But we wanted one!
My daughter gave me this really cool light... I LOVE it.
Terry cut (again and again to fit it right) a large BRANCH to hold the light,
and run from wall to wall. 
It's fantastic!
It looks like a branch is growing into the room from outside.


...and the details:

 
 The other side of the room.


 ...and that's all folks!

We had a week of so much FUN...and hard work doing this room.
Yes, we finished most of it in ONE WEEK.

What do ya think?
I know we are 'different' than the 'norm' ... of the whole house 'matching'.
Not us. 
Life is short.
Meant to be enjoyed.
We LOVE color and 'themes' and fun times.

thank you all for visiting!
danella